Soil is the foundation of any garden. It provides essential nutrients, water, and support for plants. Healthy soil is teeming with microorganisms that help break down organic matter, making nutrients available to plants. Key aspects of soil health include:
- Soil Structure: Good soil structure allows for proper air and water movement, which is vital for root growth and nutrient uptake.
- Soil pH: The pH level affects nutrient availability. Most plants prefer a slightly acidic to neutral pH (6.0-7.0).
- Nutrient Content: Essential nutrients like nitrogen, phosphorus, and potassium must be present in the right amounts for optimal plant growth
Soil Testing
Soil pH testing is an important step in understanding the health and nutrient availability of your soil. Regular soil testing helps you maintain optimal soil conditions for healthy plant growth.
According to the Virginia Cooperative Extension, it is recommended to test your soil pH about every three years. Regular testing helps you keep track of changes in the soil and ensures that you can make necessary adjustments to maintain optimal soil conditions for plant growth. If you have any specific questions about soil pH testing or need further assistance, feel free to ask!
Why Test Soil pH?
Understanding the pH level of your soil is crucial because soil pH significantly affects the availability of essential nutrients to plants and the activity of beneficial soil microorganisms. Most plants thrive best in soil that is slightly acidic to neutral, with a pH range of 6.0 to 7.0. By testing your soil pH, you can accurately determine whether you need to make any adjustments to optimize the conditions for plant growth.
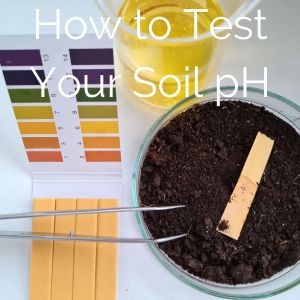
How to Test Soil pH
- Collect Soil Samples:
- Use a clean trowel or soil probe to collect samples from different areas of your garden or lawn.
- Take samples from the top 6-8 inches of soil.
- Mix the samples together in a clean bucket to get a representative sample.
- Prepare the Sample:
- Remove any debris, such as rocks, roots, or leaves.
- Allow the soil to air dry if it’s wet.
- Submit the Sample:
- Place about 1 cup of the mixed soil into a soil sample box or bag provided by the Virginia Cooperative Extension.
- Fill out the necessary forms, including information about the crops you plan to grow.
- Send the Sample:
- Send the soil sample and completed forms to the Virginia Tech Soil Testing Laboratory. Your local Extension office can provide soil sample boxes and information sheets.
- Receive Results:
- The lab will analyze the soil for pH and other nutrients. Results are typically emailed within a few days.
- The report will include recommendations for lime or sulfur applications to adjust the soil pH if necessary.
Interpreting the Results
Most plants thrive in a pH range of 5.8 to 6.8. If your soil test indicates a need for pH adjustment for your specified crop, this will be shown in the Lime Recommendation. Sometimes, a Sulfur Recommendation is suggested for certain crops when the pH is excessively high.
- Acidic Soil (pH < 6.0): May require lime to raise the pH
- Neutral Soil (pH 6.0-7.0): Ideal for most plants
- Alkaline Soil (pH > 7.0): May require sulfur or other amendments to lower the pH
Adjusting Soil pH
- To Raise pH: Apply lime according to the recommendations in your soil test report.
- To Lower pH: Apply sulfur or other acidifying agents as recommended.
For an in-depth instruction on how to read your soil report, click here. Explanation of Soil Tests | VCE Publications | Virginia Tech